
If you receive large volumes of email, you can take advantage of Gmail’s large amount of free online storage and use Gmail to manage all of your incoming and outgoing email instead of the default web hosting account. This will also allow you to use your Gmail account to send and receive Emails, but still allow your business Domain Name to be used instead of your @gmail.com email address. To do this you will first need to create a free Gmail account. Then follow the steps below:
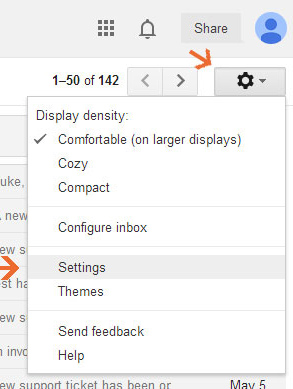
1. Login to your Gmail account, then click on the Settings link (top-right)
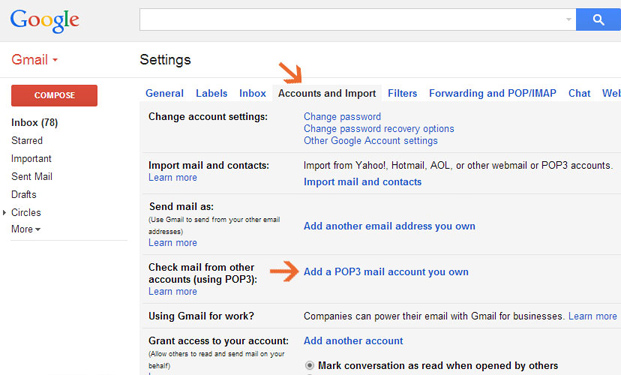
2. Click the Accounts and Import tab, then click Add a POP3 mail account you own
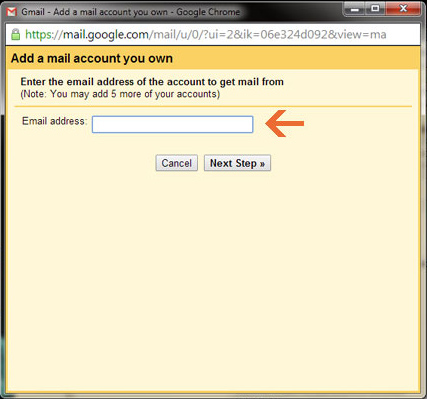
3. In the popup window, fill in the Email address of the account you want to add, then click Next Step
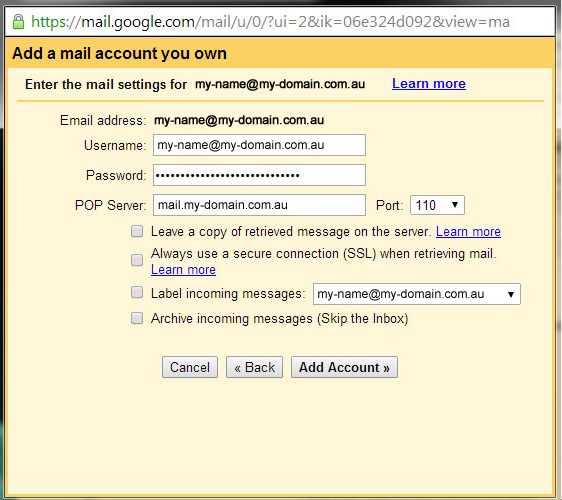
4. Enter the details below:
User Name
Your full Email address
Password
Your Email account password supplied to you by Quikclicks.
Pop Server (Incoming POP3 mail server)
“mail.your-domain.com.au” (where ‘your-domain.com.au is replaced with your actual Domain Name.
Port
Leave the default setting of 110
Leave all other settings un-selected, then click Add Account.
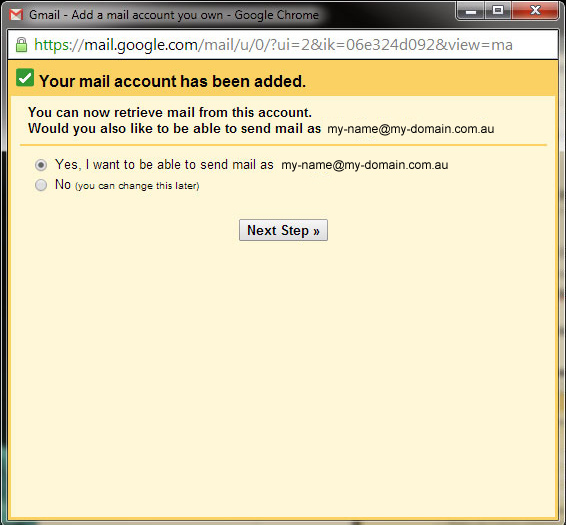
5. Select the option labelled: Yes, I want to be able to send mail and then click Next Step.
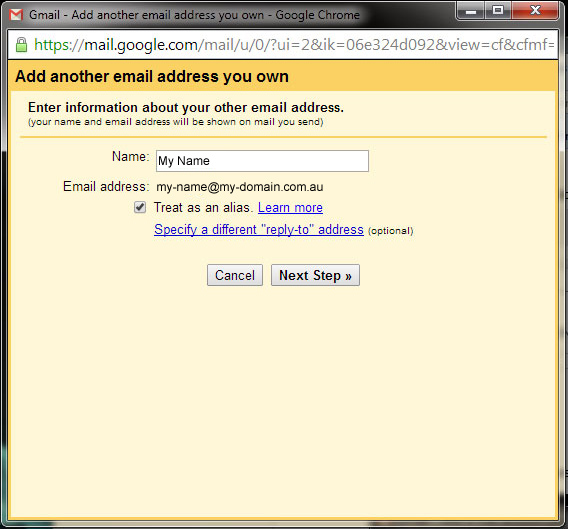
6. Enter your name or the name that you would like to appear in the “From” field of Emails sent from this new account, then click Next Step.
7. Click Send Verification. This will send an Email to your Gmail account with a link requesting your confirmation to add the new account. Click the link in that Email to activate the new account and complete the setup process.
8. If you would then like to setup the new Email account to act as the default Email account for all outgoing mail to be sent from, this can also be done in the Gmail settings area, by clicking on the Accounts tab, then selecting to Send mail as your new account by clicking the link beside it labelled make default.
NOTE: As a courtesy, we provide information about how to use certain third-party products, but we do not endorse or directly support third-party products and we are not responsible for the functions or reliability of such products. Gmail® is a registered trademark of Google Inc. in the United States and/or other countries. All rights reserved.